Overview
Captain's Deck automatically detects Git repositories and displays status information directly in the file list. No configuration required—just navigate to a Git repo and you'll see status indicators appear.
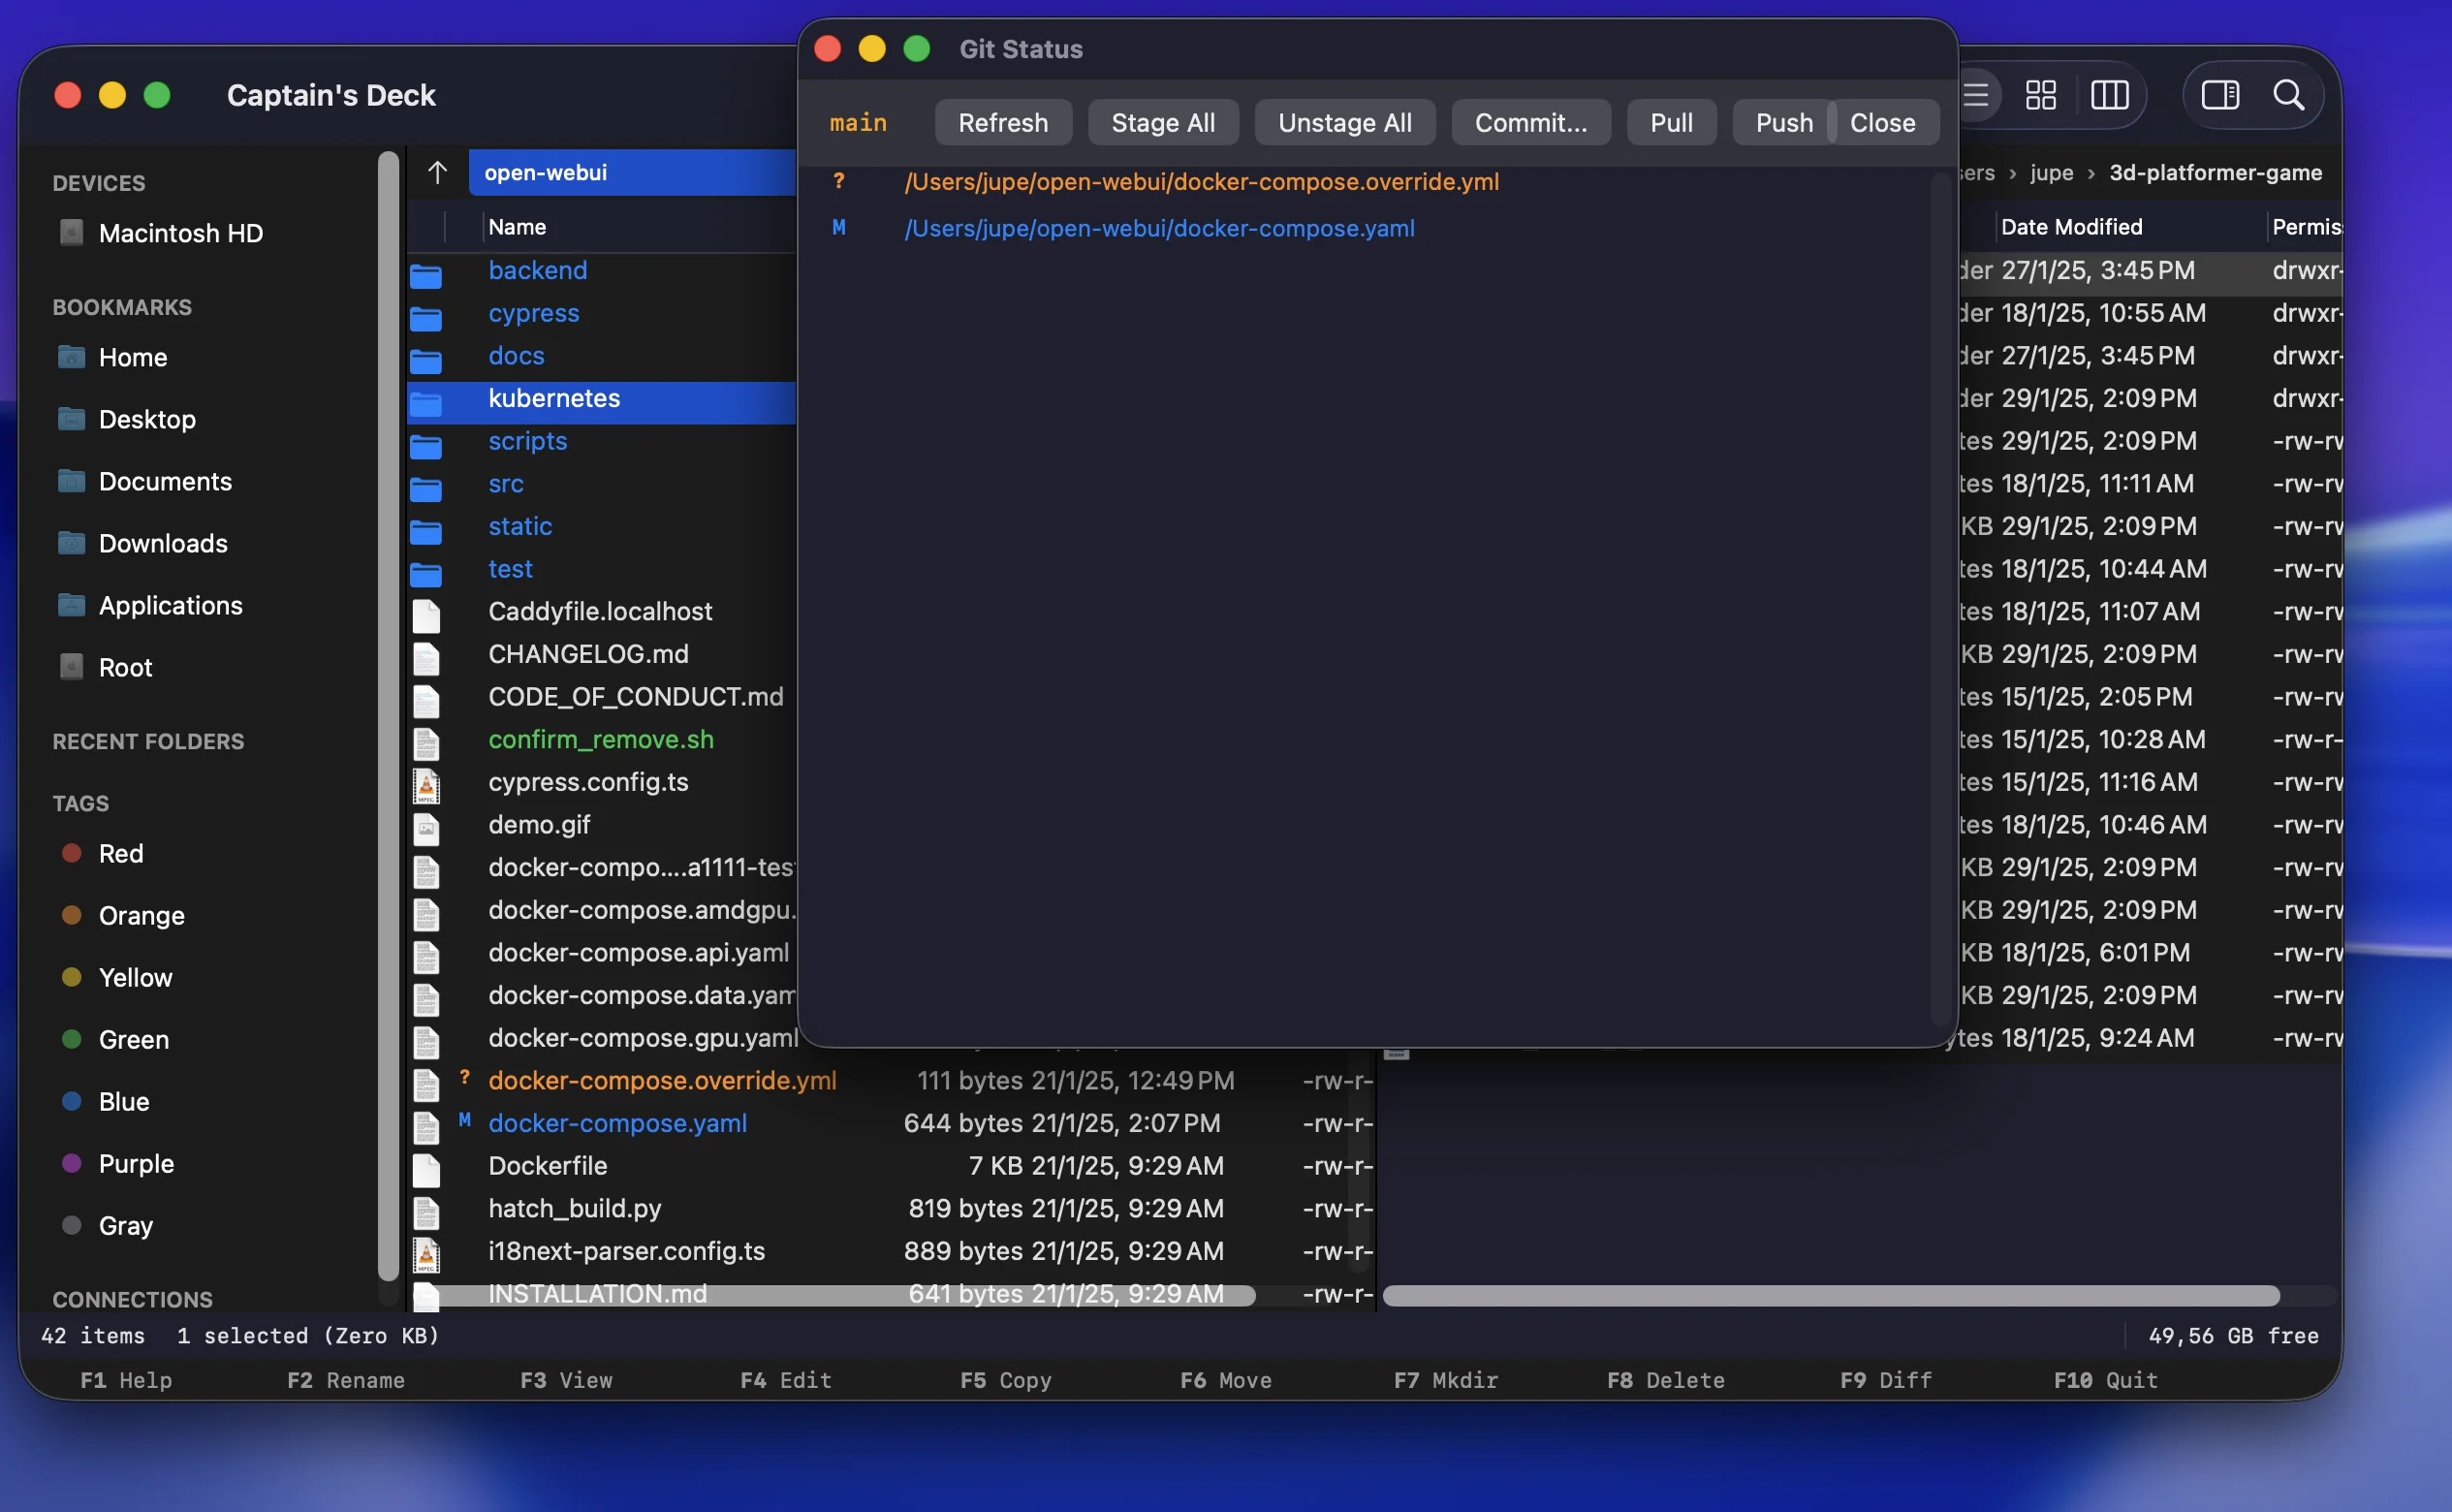
Status Indicators
Files in a Git repository show color-coded status badges:
| M | Modified — File has been changed since last commit |
| A | Added — New file staged for commit |
| D | Deleted — File has been deleted |
| ? | Untracked — New file not yet added to Git |
| ! | Conflicted — File has a merge conflict to resolve |
Directories also show aggregate status—a folder displays the "highest priority" status of its contents (e.g., if any file inside is modified, the folder shows as modified).
Branch Display
The current Git branch is displayed in the pane header when you're inside a repository. This lets you always know which branch you're working on.
Tip: Click the branch name in the header to quickly see branch information.
Context Menu Actions
Right-click on files to access Git actions:
- Stage — Add file to staging area (
git add) - Unstage — Remove file from staging area (
git reset) - Revert — Discard changes and restore to last commit (
git checkout) - Diff — View changes compared to HEAD
You can select multiple files and perform these actions in batch.
Git Status Panel
Open the Git Status Panel with Cmd + Shift + G for a comprehensive view of your repository:
- Changed Files — See all modified, added, and deleted files in one list
- Staged Changes — View what's ready to be committed
- Stage All / Unstage All — Quickly stage or unstage everything
- Commit — Write a commit message and commit directly
Double-click any file in the panel to open a visual diff.
Visual Diff
Captain’s Deck includes a side-by-side diff viewer to see exactly what changed:
- Right-click a modified file in the pane and choose Git → Show Diff, or double-click it inside the Git Status Panel.
- View additions (green), deletions (red), and modifications.
The diff viewer shows the file compared against HEAD by default. Once it’s open you can navigate hunks and (if you want) merge between sides:
| n | Next hunk |
| p | Previous hunk |
| > | Take right (left file adopts right’s version of this hunk) |
| < | Take left (right file adopts left’s version) |
| x | Skip this hunk |
| Esc | Close diff viewer |
Click Save Merged in the toolbar to commit your decisions to disk. See the diff guide for details.
Common Workflows
Quick Commit
- Make changes to your files
- Press Cmd + Shift + G to open Git Status Panel
- Review changed files, click Stage All
- Enter commit message and click Commit
Selective Staging
- Select specific files you want to commit
- Right-click and choose Stage
- Open Git Status Panel and commit only staged files
Review Changes Before Commit
- Open Git Status Panel
- Double-click each modified file to view diff
- Stage files you want to include
- Commit when ready
Keyboard Shortcuts
| Cmd + Shift + G | Open Git Status Panel |
Diff and other Git actions live in the right-click Git submenu on selected files.